Troubleshooting
When things don’t seem to be working right, here are some things to try.
Common Mistakes
Many people name their first script bleak.py. This causes the script to
crash with an ImportError similar to:
ImportError: cannot import name 'BleakClient' from partially initialized module 'bleak' (most likely due to a circular import) (bleak.py)`
To fix the error, change the name of the script to something other than bleak.py.
macOS Bugs
Bleak crashes with SIGABRT on macOS
If you see a crash similar to this:
Crashed Thread:        1  Dispatch queue: com.apple.root.default-qos

Exception Type:        EXC_CRASH (SIGABRT)
Exception Codes:       0x0000000000000000, 0x0000000000000000
Exception Note:        EXC_CORPSE_NOTIFY

Termination Reason:    Namespace TCC, Code 0
This app has crashed because it attempted to access privacy-sensitive data without a usage description. The app's Info.plist must contain an NSBluetoothAlwaysUsageDescription key with a string value explaining to the user how the app uses this data.
It is not a problem with Bleak. It is a problem with your terminal application.
Ideally, the terminal application should be fixed by adding NSBluetoothAlwaysUsageDescription
to the Info.plist file (example).
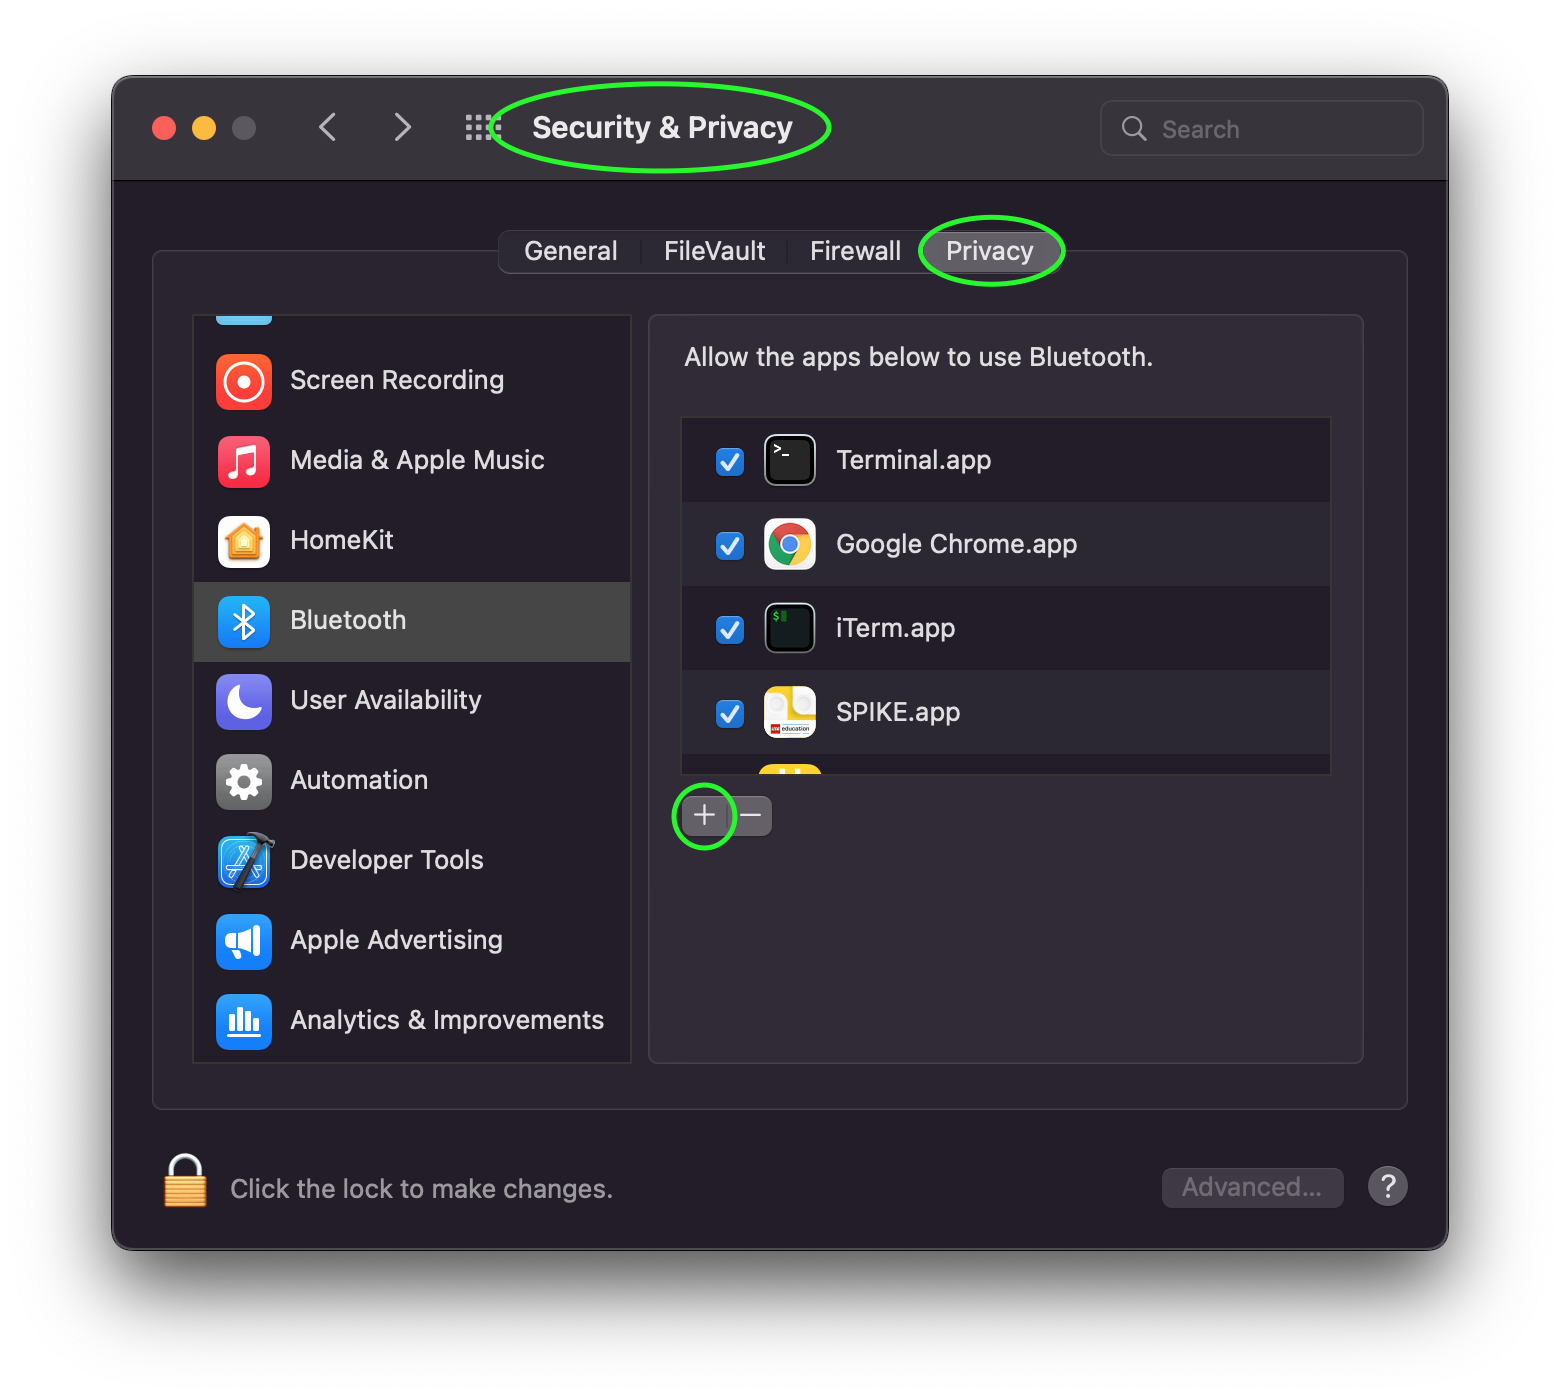
It is also possible to manually add the app to the list of Bluetooth apps in the Privacy settings in the macOS System Preferences.

If the app is already in the list but the checkbox for Bluetooth is disabled,
you will get the a BleakError: “BLE is not authorized - check macOS privacy settings”.
instead of crashing with SIGABRT, in which case you need to check the box
to allow Bluetooth for the app that is running Python.
No devices found when scanning on macOS 12
A bug was introduced in macOS 12.0 that causes scanning to not work unless a
list of service UUIDs is provided to BleakScanner. This bug was fixed in
macOS 12.3. On the affected version, users of bleak will see the following
error logged:
macOS 12.0, 12.1 and 12.2 require non-empty service_uuids kwarg, otherwise no advertisement data will be received
See #635 and #720 for more information including some partial workarounds if you need to support these macOS versions.
Enable Logging
The easiest way to enable logging is to set the BLEAK_LOGGING environment variable.
Setting the variable depends on what type of terminal you are using.
Posix (Linux, macOS, Cygwin, etc.):
export BLEAK_LOGGING=1
Power Shell:
$env:BLEAK_LOGGING=1
Windows Command Prompt:
set BLEAK_LOGGING=1
Then run your Python script in the same terminal.
Connecting to multiple devices at the same time
If you’re having difficulty connecting to multiple devices, try to do a scan first and
pass the returned BLEDevice objects to BleakClient calls.
Python:
import asyncio
from typing import Sequence

from bleak import BleakClient, BleakScanner
from bleak.backends.device import BLEDevice


async def find_all_devices_services():
    devices: Sequence[BLEDevice] = await BleakScanner.discover(timeout=5.0)

    for d in devices:
        async with BleakClient(d) as client:
            print(client.services)


asyncio.run(find_all_devices_services())
Capture Bluetooth Traffic
Sometimes it can be helpful to see what is actually going over the air between the OS and the Bluetooth device. There are tools available to capture HCI packets and decode them.
Windows 10
There is a Windows hardware developer package that includes a tool that supports capturing Bluetooth traffic directly in Wireshark.
Install
Download and install Wireshark.
Download and install the BTP software package.
Capture
To capture Bluetooth traffic:
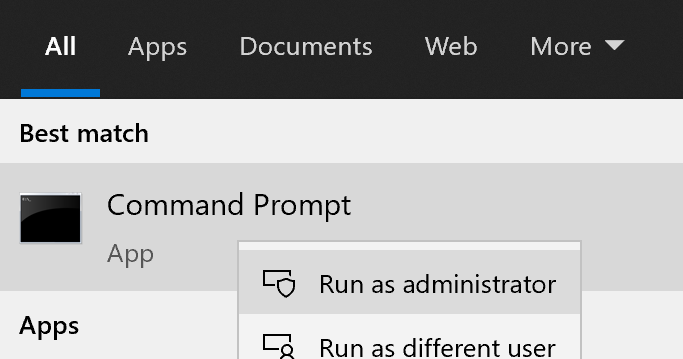
Open a terminal as Administrator.
Run
C:\BTP\v1.9.0\x86\btvs.exe. This should automatically start Wireshark in capture mode.Tip
The version needs to match the installed version.
v1.9.0was the current version at the time this was written. Additionally,C:may not be the root drive on some systems.Run your Python script in a different terminal (not as Administrator) to reproduce the problem.
Click the stop button in Wireshark to stop the capture.
macOS
On macOS, special software is required to capture and view Bluetooth traffic. You will need to sign up for an Apple Developer account to obtain this software.
Go to https://developer.apple.com/download/more/ and download Additional Tools for Xcode … where … is the Xcode version corresponding to your macOS version (e.g. 12 for Big Sur, 11 for Mojave, etc.).
Open the disk image and in the Hardware folder, double-click the PacketLogger.app to run it.
Click the Clear button in the toolbar to clear the old data.
Run your Python script to reproduce the problem.
Click the Stop button in the toolbar to stop the capture.
Tip
The Bluetooth traffic can be viewed in the PacketLogger.app or it can be saved to a file and viewed in Wireshark.
Linux
On Linux, Wireshark can be used to capture and view Bluetooth traffic.
Install Wireshark. Most distributions include a
wiresharkpackage. For example, on Debian/Ubuntu based distributions:sudo apt update && sudo apt install wireshark
Start Wireshark and select your Bluetooth adapter, then start a capture.
Tip
Visit the Wireshark Wiki for help with configuring permissions and making sure proper drivers are installed.
Run your Python script to reproduce the problem.
Click the stop button in Wireshark to stop the capture.
Handling OS Caching of BLE Device Services
If you develop your own BLE peripherals, and frequently change services, characteristics and/or descriptors, then Bleak might report outdated versions of your peripheral’s services due to OS level caching. The caching is done to speed up the connections with peripherals where services do not change and is enabled by default on most operating systems and thus also in Bleak.
There are ways to avoid this on different backends though, and if you experience these kinds of problems, the steps below might help you to circumvent the caches.
macOS
The OS level caching handling on macOS has not been explored yet.
Linux
When you change the structure of services/characteristics on a device, you have to remove the device from
BlueZ so that it will read everything again. Otherwise BlueZ gives the cached values from the first time
the device was connected. You can use the bluetoothctl command line tool to do this:
bluetoothctl -- remove XX:XX:XX:XX:XX:XX
# prior to BlueZ 5.62 you also need to manually delete the GATT cache
sudo rm "/var/lib/bluetooth/YY:YY:YY:YY:YY:YY/cache/XX:XX:XX:XX:XX:XX"
…where XX:XX:XX:XX:XX:XX is the Bluetooth address of your device and
YY:YY:YY:YY:YY:YY is the Bluetooth address of the Bluetooth adapter on
your computer.
